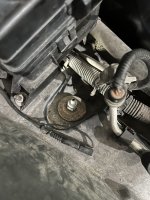
Your working way too hard on it. The front ones if anyone is doing them, you just jack the car up put stands under the frame . then a jack under the control arm. There is a special socket that fits inside the stock shock with a wrench you unbolt the nut while holding the shaft. Then you remove the four bolts that mount the control arms to the frame. Just check if there are shims behind them. 90% of the time nothing but one washer per bolt lower the jack and the shock comes right out. .on the sims the two wire go to the shock plug the three wire go to the position module that links to the control arm. I go the extra 5 minutes and remove the link and module to cut out noise weight and clean up the look. Ill try and send you some photos to tie the wiring up so its out of the way.
Thank you for the info Michael but I respectfully disagree on the working too hard part. The key here is “the special socket”. If you haven’t changed one of these shocks you are probably going to be working too hard. If you don’t have a special socket you are probably going to be working too hard. The other part is, after doing the first one I was able to cut the time in half on the second one.
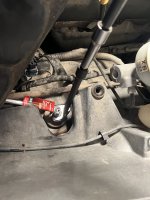
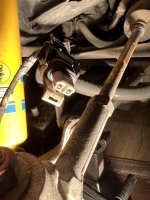
I did use the jack stand under the frame and the jack under the arm. But jack it up too high, there isn’t enough room to remove, too low and it hits the A- arm. No special tool? Use a crows foot and a 7mm or a hex key. Not enough room to remove, cut the shock shaft. Nothing to collapse the shock on the re-install, make a harness out of zip ties. The thought process and homemade engineering eats up the clock, big time. But I enjoy working on the car and coming up with solutions, it’s my therapy.
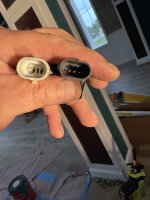
And yes, the two cavity simulator goes up top as the instructions told me. But if the 3 cavity doesn’t fit then it doesn’t fit. It doesn’t fit.
Long story short, the shocks work great despite 2 lights being on which I assume is due to not having the correct simulator. I was warned this shock setup wouldn’t work on my car, too low. But it rides great, looks great as it is lower but doesn’t impede the steering. So my lesson here is Newbies take an awful long time to do stuff but if they are tenacious they can get the job done correctly despite numerous obstacles which are often not documented or confusion over different methods available. Again, the manuals were worthless.
I pulled it back in and had the first rear shock out in 30 mins including the jack up and the tire removal.
More tomorrow on the simulators and the finishing the rears, and of course, the ride.
 . I’ve replaced the ECM, the Top Module, the Top Pump, but still no action on the top. I was able to get it down, it takes some patience but it’s down which isn’t a problem now but I’ve got enough money in it, I’m going to see it through.
  I’ll start focusing on that as the weather turns. For now I’m driving it!