justdennis
Seasoned Member
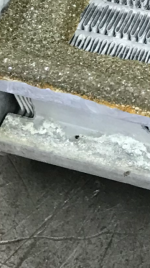
I have a 2007 XLR V that I purchased in January of 2022. Shortly after I got it home I discovered that the heater core had been leaking and the pervious owner had bypassed the core and connected the two heater hoses together. He had also covered up the smell of the antifreeze with some very strong air freshener. The passenger side carpet and padding were saturated with antifreeze as well. Clearly an intentional cover up but as I had purchased the car at an auction It was what it was. I am not posting here to complain about my misfortune but to inform you boys and girls of the fun I had replacing the heater core. First let me say this, if you own a V and you have a bad heater core, move somewhere warm and just live with it, you may save money.
My first mistake was thinking I could do this, I've worked on cars my whole life, what's the big deal right. Ok the big deal is, sure I changed a heater core before but that was 50 years ago and it was on a 1968 Rambler. You may not be aware of this but there have been some changes in the way cars are assembled in the last 50 years. For example when an XLR V is built they start with a heater core coming down the assembly and build the rest of the car around it. Pretty much the opposite of the way they use to do it, that's progress. Also that old Rambler had one wiring diagram, in the V shop manual there are over seventy, yes 70.
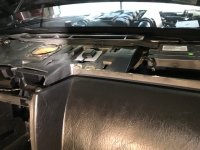
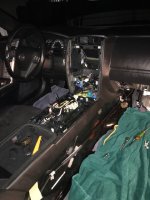
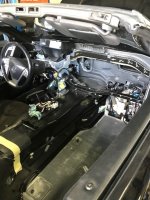
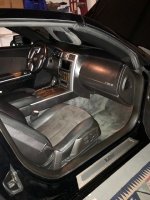
This story is as long as War and Peace so I'll just hit the high lights and as this journey started over 3 months ago I'm sure I'll forget some details. First lower the top and disconnect the battery. I started by removing the passenger seat, carpet and padding then the glove box and the blower motor hoping I would at least be able to see the heater box, no such luck. Then I started removing everything on and around the dash, the dash pad, shifter knob, face plate and center stack, console, every piece of plastic on under and around the dash and windshield, radio, air ducts, speakers, instrument cluster. Now at this point I could remove the dash, with a little finesse this can be done without removing the steering wheel or HUD box but you must lower and extend the steering wheel, before you disconnect the battery. Now you can remove the passenger dash air bag, the battery MUST be disconnected before doing this.
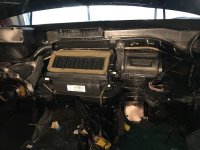
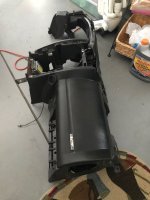
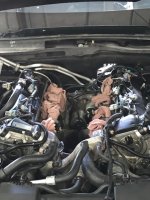
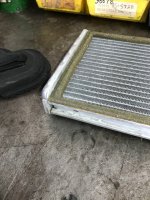
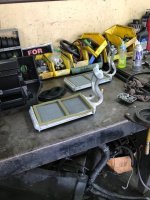
Now you have before you the HVAC module, home free right, wrong. I spent more then a few days trying to either extract the heater core from this black box or remove the whole module but it wasn't meant to be. After getting a few more opinions and doing a lot more research I discovered that the HVAC module has two studs that go through the firewall and the only way to remove the nuts on the studs is by first removing the supercharger/intake manifold from the engine. Now the only thing I wanted to do was find the engineer that designed this car and punch him right in the face. At that point I was ready to reassemble everything and live with it but I had come to far for that and my pride would never allow it. No self respecting car guy would give up after coming this far, but I did know I had hit my limit so I tapped out and found a garage that would handle that part for me. Once they got the module back in the car they allowed me to start reassembling the dash while they finished under the hood so we could start the car before it left their shop. After a month and a half in their garage I was finally able to drive it back to my garage and finish reassembly. I know that seems like a long time but in their defense it was a fill in job when they had the time and we also replaced the AC evaporator which is also in the module and new cam cover gaskets, spark plugs and an oil change plus a few other thing I can't remember. A few more days of reassembly at home and all is right in my world again. As I was doing all this I labeled all the wires and there were a lot of them and I took a lot of pictures which all helped with reassembly, I will try to post some of these pictures, but no promises, I haven't done this before.
I hope you have found this entertaining if not helpful.
Happy trails,
Justdennis
My first mistake was thinking I could do this, I've worked on cars my whole life, what's the big deal right. Ok the big deal is, sure I changed a heater core before but that was 50 years ago and it was on a 1968 Rambler. You may not be aware of this but there have been some changes in the way cars are assembled in the last 50 years. For example when an XLR V is built they start with a heater core coming down the assembly and build the rest of the car around it. Pretty much the opposite of the way they use to do it, that's progress. Also that old Rambler had one wiring diagram, in the V shop manual there are over seventy, yes 70.
This story is as long as War and Peace so I'll just hit the high lights and as this journey started over 3 months ago I'm sure I'll forget some details. First lower the top and disconnect the battery. I started by removing the passenger seat, carpet and padding then the glove box and the blower motor hoping I would at least be able to see the heater box, no such luck. Then I started removing everything on and around the dash, the dash pad, shifter knob, face plate and center stack, console, every piece of plastic on under and around the dash and windshield, radio, air ducts, speakers, instrument cluster. Now at this point I could remove the dash, with a little finesse this can be done without removing the steering wheel or HUD box but you must lower and extend the steering wheel, before you disconnect the battery. Now you can remove the passenger dash air bag, the battery MUST be disconnected before doing this.
Now you have before you the HVAC module, home free right, wrong. I spent more then a few days trying to either extract the heater core from this black box or remove the whole module but it wasn't meant to be. After getting a few more opinions and doing a lot more research I discovered that the HVAC module has two studs that go through the firewall and the only way to remove the nuts on the studs is by first removing the supercharger/intake manifold from the engine. Now the only thing I wanted to do was find the engineer that designed this car and punch him right in the face. At that point I was ready to reassemble everything and live with it but I had come to far for that and my pride would never allow it. No self respecting car guy would give up after coming this far, but I did know I had hit my limit so I tapped out and found a garage that would handle that part for me. Once they got the module back in the car they allowed me to start reassembling the dash while they finished under the hood so we could start the car before it left their shop. After a month and a half in their garage I was finally able to drive it back to my garage and finish reassembly. I know that seems like a long time but in their defense it was a fill in job when they had the time and we also replaced the AC evaporator which is also in the module and new cam cover gaskets, spark plugs and an oil change plus a few other thing I can't remember. A few more days of reassembly at home and all is right in my world again. As I was doing all this I labeled all the wires and there were a lot of them and I took a lot of pictures which all helped with reassembly, I will try to post some of these pictures, but no promises, I haven't done this before.
I hope you have found this entertaining if not helpful.
Happy trails,
Justdennis