Welcome to the Cadillac XLR Forums!

Finally got my XLR, Now to Rebuild it!

A Little Roadtrip for Parts

Well it's been a while since I last posted progress on the car but I've had a few other projects going on besides the XLR. I am quite a bit farther than I've posted so hopefully I'll catch up soon.
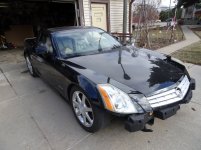
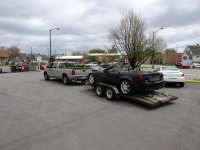
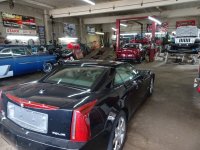
Anyway, I found a fender and luckily it was the same color as car but it required a good roadtrip to pick it up as they would not ship it. Made the trip into a short visit with relatives and was going right by Beard Bros. on the way so I stopped in to say hi and check out his shop and XLR. His was the first one I've actually looked at in person besides mine and it was great to see another one to check out a few things I needed to know to put mine back together.
His shop is in a cool old Chevrolet dealership and was great to talk with him-----thanks Jim!
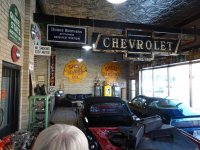
DSC02768.jpg

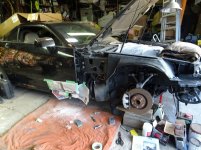
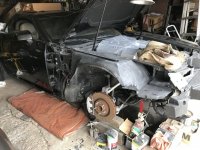
So just had to see what the good fender looked like on the car!
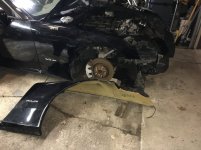
IMG_3512.jpg

I had to do a little repair on front of rocker panel where fender crushed it at the mounting point and also front of inner fender that got damaged by collision. I didn't think it was bad enough to change out whole inner fender as that didn't look like a fun job anyway so I tried a little fiberglass repair. Haven't done that in years but it turned out pretty descent.
Also had to straighten very edge of bumper reinforcement and replace the aluminum extension.
DSC02940.jpg

IMG_3797.jpg

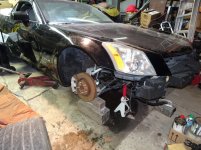
Starting to look like something now!
DSC03013.jpg

DSC03024.jpg

Kevin
 
be careful what you use on the SMC

The only thing I have found that will work well on smc is Evercoat smc resin 864 You also need to find some special mat as most of it is for regular resin (the old stuff has some sort of wax coating on the fiberglass material). You can use it but it will show in a year and can release from structure sooner than that. If you have any finish work that will show use Vette PAnel adhesvive /filler 100870. Slimy stuff but it works great. sands pretty well for a finish coat and its the only material I have seen that will move at the same rate as the SMC panel you are repairing. works relly well for rocker road rash and front bumper rash. Poly putty and most other fiberglass repair material will shrink faster than the smc. I have documented dozens of failures of all types of material over the years since fusor started repair material for the Viper with a repair warranty that they had to honor on a bunch of occasions.
 
Finally a Front Bumper!

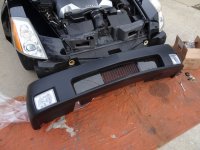
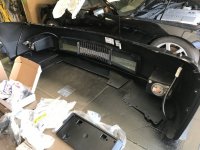
So I picked up a Keystone Premium Remanufactured front bumper even before the car arrived. Been sitting around wrapped up for quite a while so I finally took it out and looked at it. Have to admit it was a very nice one, only found one little flaw in it.
I did a test fit of everything just to see how it all went together before it was painted.

DSC03061.jpg

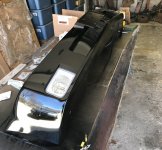
Originally the bumper was supposed to go to a body shop that a friend who has a car dealership uses but due to me delaying and then the body shop being busy and wanting to get it assembled I decided to try painting it myself.
Been quite a while since I did any paint work but since it was just a bumper and it was just GM black I gave it a shot. Basically did it in the garage with the door open so probably as far away from a spray booth as you could get.
Just used some acrylic enamel with urethane hardener I had and it turned out pretty descent.

IMG_4071M.jpg

IMG_4074M.jpg

Now I actually got to assemble it for real. Fog-lights, headlamp washers and hoses, lower grille, license plate bracket and all.

IMG_4102.jpg

IMG_4112M.jpg

All assembled ! :)

IMG_4114.jpg

Now to take care of a bunch of details, some new tires and then off to the frame shop to check it out.

Kevin
 
He's a magic man,,,,,,,,,,

Kevin,,, You are a miracle worker....excellent job!! :thumbsup

Keep us updated until finished...

p z
 
So I picked up a Keystone Premium Remanufactured front bumper even before the car arrived. Been sitting around wrapped up for quite a while so I finally took it out and looked at it. Have to admit it was a very nice one, only found one little flaw in it.
I did a test fit of everything just to see how it all went together before it was painted.


Originally the bumper was supposed to go to a body shop that a friend who has a car dealership uses but due to me delaying and then the body shop being busy and wanting to get it assembled I decided to try painting it myself.
Been quite a while since I did any paint work but since it was just a bumper and it was just GM black I gave it a shot. Basically did it in the garage with the door open so probably as far away from a spray booth as you could get.
Just used some acrylic enamel with urethane hardener I had and it turned out pretty descent.

Now I actually got to assemble it for real. Fog-lights, headlamp washers and hoses, lower grille, license plate bracket and all.

All assembled ! :)

View attachment 8026

Now to take care of a bunch of details, some new tires and then off to the frame shop to check it out.

Kevin


Really enjoying reading all you have done. I envy you for having the guts to take this kind of job on. We have done lots of classic cars but modern cars are a whole different thing. So how close are you to being done?
 
Finally Off To Frame Shop

Well since everything was basically together I was ready to take it to the frame shop.

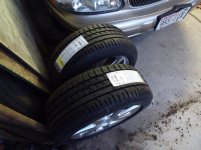
Before that though, I wanted to get some new tires on it. The 3 matching ones on it were probably at 50% and starting to crack pretty good. Goodyear had a $200 rebate on a set of F1 Asymetrics so I went with them.

DSC03252.jpg

Next thing was I had to load it on my trailer to get over to the frame shop. As with almost every other vehicle I load on my trailer, once it's loaded I pretty much have to crawl out window to get out because usually I can't open door because it hits on fender of trailer.

There is no way I can crawl through window on this car so I guess it's time to try out the top. I didn't want to try it until it was warm out so now was the time.

Good news is it worked!

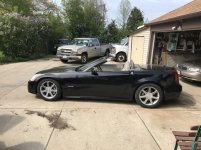
So loaded up on trailer ready to go.

DSC03369.jpg

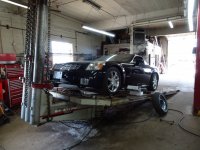
Sitting on frame machine (just to store it out of the way until they could get it on alignment machine)

DSC03397.jpg

Great news at frame shop. First time I ever had a car in that was less damage than I figured! Just needed an alignment, nothing tweaked and no hidden damage I missed. They did have to adjust the ride height a bit, a little up in front and a little down in back. Does sit much nicer now.
He said it could use a set of rear tie rods so I picked them up next day and they installed them.

DSC03396.jpg

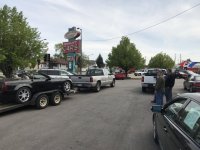
So loaded it back up on trailer and on way home stopped by the car lot where I had it delivered to originally when I first got it and had so much fun that day trying to get it off the car hauler!
Just wanted to show the guys I was actually getting something done!

IMG_4340.jpg

Back home, ready for final details before I can take it in for the salvage inspection!

IMG_4344.jpg

Thanks for all the comments and encouragement so far.

Kevin
 
Well since everything was basically together I was ready to take it to the frame shop.

There is no way I can crawl through window on this car so I guess it's time to try out the top. I didn't want to try it until it was warm out so now was the time.

Good news is it worked!

Kevin


Awesome news all around: another XLR saved to drive the roads again. I am looking forward to your 'drivers experience' report! :burnout:
 
A Little Bling!

So now that most of the work is done and before the salvage inspection I wanted to put on a few finishing touches.

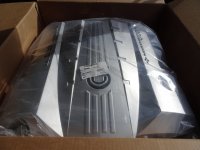
First, since the engine cover was completely missing for some reason I called around for a used one but most were aged and worn quite a bit so I checked to see if a new one was still available. Turns out a new one was barely more than I could of got a used one for.

DSC03017.jpg

Pretty!

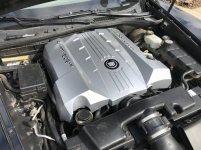
DSC03019.jpg

Makes it look a little newer under the hood!

IMG_3838.jpg

Also finally got to install the new factory XLR floormats I bought from Pure Zen

IMG_4433.jpg

Thanks, Larry! Now I had to put a set of clear ones over them so I don't get them dirty!

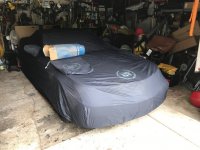
Usually don't buy a custom fit car cover but I found one for such a deal I couldn't pass it up.

IMG_4738.jpg

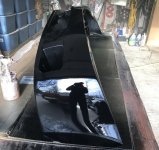
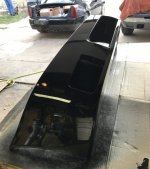
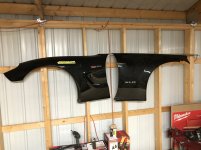
Thought you'd like to see what I did with the damaged fender.
Before I even got this car I had bought a slightly damaged Corvette Z06 fender for $50 at a swap meet that was labeled as "wall art".
I mounted it on the wall in my storage building in the loft and now that I had this one I mounted it opposite of that one for a little comparison "wall art"!

IMG_3986.jpg

Well basically now everything is done and ready for the inspection in the next couple days,

Wish me luck!

Kevin
 
So now that most of the work is done and before the salvage inspection I wanted to put on a few finishing touches.

First, since the engine cover was completely missing for some reason I called around for a used one but most were aged and worn quite a bit so I checked to see if a new one was still available. Turns out a new one was barely more than I could of got a used one for.
Also finally got to install the new factory XLR floormats I bought from Pure Zen

View attachment 8108

Thanks, Larry! Now I had to put a set of clear ones over them so I don't get them dirty!

Thought you'd like to see what I did with the damaged fender.
Before I even got this car I had bought a slightly damaged Corvette Z06 fender for $50 at a swap meet that was labeled as "wall art".
I mounted it on the wall in my storage building in the loft and now that I had this one I mounted it opposite of that one for a little comparison "wall art"!

View attachment 8110

Wish me luck!

Kevin


Super impress of all that you have done......but.....
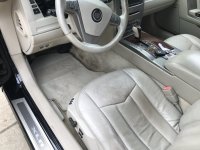
Looks like that interior could use some of that attention you have been lavishing on the mechanics and exterior cosmetics.......Just Sayin'... those seats look like they could get my jeans dirty!
All that hard work and someone just has to point the one big thing you have not yet attacked! That would be me :chuckle

Looks like you have a nice new shop to work on things too!
Best of luck with the title etc, we will be awaiting that report!
 
Interior

Yeah, I can see what you’re saying looking at picture now but I can assure you the interior is very clean. My wife never would of sat in it if it wasn’t!;)
Just typical wear on light colored leather for a car with some miles on it. Even carpet is nice. Them lighter colored interiors never seem to photograph well. Shows every little wear mark in the leather.

I have an older Eldorado too with almost same color interior and pictures I had to look at of it from dealer made the interior look awful but when I actually got there to look at it in person it looked fine. I was pleasantly surprised by that. Didn’t look like same car.

Kevin
 
Leather/vinyl/dash restore

Yeah,:burnout: I can see what you’re saying looking at picture now but I can assure you the interior is very clean. My wife never would of sat in it if it wasn’t!;)
Just typical wear on light colored leather for a car with some miles on it. Even carpet is nice. Them lighter colored interiors never seem to photograph well. Shows every little wear mark in the leather.

I have an older Eldorado too with almost same color interior and pictures I had to look at of it from dealer made the interior look awful but when I actually got there to look at it in person it looked fine. I was pleasantly surprised by that. Didn’t look like same car.

Kevin


There is a product called Rub n Restore that may be the solution to the seats; assuming the darkness I see is where the smooth surface of the leather is worn and we are seeing the rough/suede portion of the leather below. (click here>>) Leather Restoration - Vinyl & Leather Paint - Furniture Repair I had been investigating it for pertaining to classic car restoration; dashes and seats etc, although I have not yet tried it but know of some other people who have. Check it out.
:burnout:
 
Wow, that looks like some miracle stuff if it works like that!
I will check that out further. Looks like they have quite a few stock colors but I don't see one exactly like mine (shale?) but I see they can color match and custom make them.
The leather on the drivers seat is just plain worn, no rips or anything and yes, I 'm sure the dark spots are just the surface below color. Honestly it doesn't look all that bad in person but compared to the passenger seat it could definitely use some freshening up! A new cover would be great but I'd definitely give that stuff a try first. Could use it on my Eldo too!
This car is actually probably the cleanest one I've had besides a new one, Was definitely someone's baby and looks like they took really good care of it besides totaling it!
So far it looks like absolutely everything works on it :)


Thanks for the info!

Kevin
 
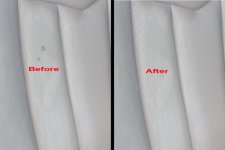
Also give seatdoctors.com a look. I got a small kit from there a couple of years ago for my shale interior. Perfect match and it hasn't worn a whit.
 
Also give seatdoctors.com a look. I got a small kit from there a couple of years ago for my shale interior. Perfect match and it hasn't worn a whit.


Wow, that looks like a great product! Did you take before and after photos of your fix?
 
Wow, that looks like a great product! Did you take before and after photos of your fix?

Found it! Don't try to pick at gum that stuck on the seats. But it was a perfect match after drying.
 

Attachments

  • seat before and after dyeing.jpg
    seat before and after dyeing.jpg
    121.5 KB · Views: 463
Ordered!

That is impressive. Looked it up and ordered a 4oz. bottle in shale.
That place is within 100 miles of me so should get it fairly soon and will try it and post results then.
Thanks for the tips!

Kevin
 
Street Legal !!!

Finally was able to schedule and go for my salvage inspection!
Here in Wisconsin they do them at State Patrol headquarters, Police and Sheriff offices by specially trained officers. Closest one to me was the State Patrol and when I called for an appointment he squeezed me in between a couple other appointments a couple days later.

Didn't give me much of a chance to check everything over and make sure everything was in order but I thought I was all set.
I never really got to drive it around any distance, just around the block basically to make sure it drove ok and everything was working right. It's about a 20 mile trip out to the State Patrol headquarters so I was hoping there wouldn't be any problems.

Got out there ok. Parked it and went inside to let them know I was there.

IMG_4990.jpg

Inspection went pretty smooth. He only gigged me on one thing. I had forgot to tighten the bolt down on the battery hold down. I had taken battery out originally to charge it up and must of never tied it back down. He just told me to take care of that which I did.

So I passed!
And got temporary plate.

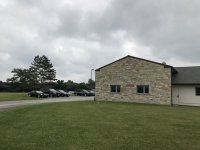
After inspection, Parked outside Headquarters:

IMG_4992.jpg

Celebrated by driving to work after.

IMG_5002.jpg

So now it's legal!
I noticed a couple issues with it on that trip. First one is I definitely have a bad front wheel bearing. Used Corvette spindle I put in I guess had a bad wheel bearing in it. No big deal on that. Ordered a new one and will change that soon.
Next is I have a small oil leak somewhere. I know Northstar's are famous for that. Just hoping it's not one of the serious ones.

Anyway, just glad that is over. I'll have a rebuilt title now. Never mattered any to me on any other ones I've ever done. I never did them to resell anyway, just for my own use. Last ones I did were 11 years ago and vehicles were a couple years old already so by the time they are that old I doubt it matters much on resale anyway.

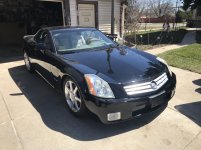
Regardless I have an XLR and it's back on the road! :)

Kevin
 
Finally was able to schedule and go for my salvage inspection!
Here in Wisconsin they do them at State Patrol headquarters, Police and Sheriff offices by specially trained officers. Closest one to me was the State Patrol and when I called for an appointment he squeezed me in between a couple other appointments a couple days later.

Didn't give me much of a chance to check everything over and make sure everything was in order but I thought I was all set.
I never really got to drive it around any distance, just around the block basically to make sure it drove ok and everything was working right. It's about a 20 mile trip out to the State Patrol headquarters so I was hoping there wouldn't be any problems.

Got out there ok. Parked it and went inside to let them know I was there.

View attachment 8159

Inspection went pretty smooth. He only gigged me on one thing. I had forgot to tighten the bolt down on the battery hold down. I had taken battery out originally to charge it up and must of never tied it back down. He just told me to take care of that which I did.

So I passed!
And got temporary plate.

After inspection, Parked outside Headquarters:

View attachment 8160

Celebrated by driving to work after.

View attachment 8161

So now it's legal!
I noticed a couple issues with it on that trip. First one is I definitely have a bad front wheel bearing. Used Corvette spindle I put in I guess had a bad wheel bearing in it. No big deal on that. Ordered a new one and will change that soon.
Next is I have a small oil leak somewhere. I know Northstar's are famous for that. Just hoping it's not one of the serious ones.

Anyway, just glad that is over. I'll have a rebuilt title now. Never mattered any to me on any other ones I've ever done. I never did them to resell anyway, just for my own use. Last ones I did were 11 years ago and vehicles were a couple years old already so by the time they are that old I doubt it matters much on resale anyway.

Regardless I have an XLR and it's back on the road! :)

Kevin

Such a terrific accomplishment. I hope you and your wife enjoy this model car as much as we do. It's a unique luxury roadster with a ride that is uncharacteristically smooth and highly controlled for a sports car. Happy day, James
 

Cadillac XLR Forums

Not a member?  Join now!  It's Free!

Learn more about Supporting Membership

Win 2 Supercharged Cadillacs!

Win both supercharged Cadillac Vs!

Supporting Vendors

Taput Tunning LLC

Top Hydraulics

Cadillac XLR Registry

Click here to enter the official Cadillac XLR and XLR-V Registry
Back
Top Bottom